 how-to
Best Ways to Refresh Decks: 2026 How-To Guide
Table of Contents
- Start With a Deck Inspection and the Water Drop Test
- How to Clean a Deck Before Staining
- Stripping, Sanding, and Surface Preparation
- Best Deck Stain for Old Wood (and Paint vs. Stain)
- When to Replace Deck Boards Instead of Refinishing
- Resurfacing Options: Coatings, Composite, and Stone Decking
- Troubleshooting Common Deck Refresh Failures
- Frequently Asked Questions
Last Updated: September 13, 2026
Start With a Deck Inspection and the Water Drop Test
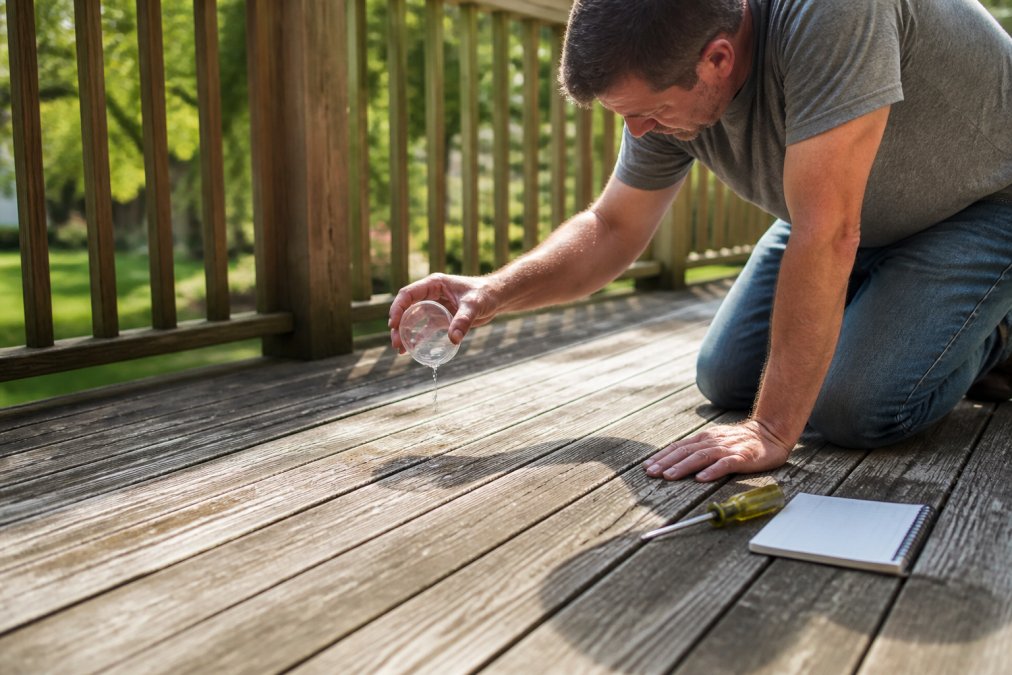
The single most useful test before you refresh decks is the water drop test, and it takes about ten seconds. Drip water onto a dry board: if it beads up, the wood is sealed and will reject new stain; if it soaks in within a minute or two, the wood is bare enough to accept finish.
That one result tells you more than any product label. Most homeowners skip it, then wonder why the finish pools on top of the boards and peels within a season.
At Superior Painting and Remodeling LLC, our crews run this test on every deck assessment before quoting a refresh, because it separates a weekend cleaning job from a full strip-and-sand project.
Reading Wood Grain, Cracks, and Moisture Content
Once you know how the wood absorbs water, inspect the surface. Raised, fuzzy fibers and a bleached gray tone mean weathering has broken down the surface layer. Horizontal cracks along the grain are usually cosmetic; deep vertical cracks or spongy boards point to rot and a different kind of project.
A moisture content reading matters too. A simple pin-type meter from a hardware store confirms the wood is dry; staining damp boards traps moisture underneath and guarantees peeling.
How to Clean a Deck Before Staining
Cleaning decides how well your finish bonds, and it is the step most DIYers rush. The goal is to remove dirt, mildew, and old failing finish without damaging the wood fibers underneath.
A solution of water and a dedicated deck cleaner, applied with a pump sprayer and scrubbed along the grain, handles most light-to-moderate cases. Rinse thoroughly and let the wood dry 24 to 48 hours before testing again.
Water, Power Washer, or Chemical Cleaner?
Each method suits a different condition; the wrong one causes real damage.
- Garden hose and brush: Best for lightly soiled decks with intact finish. Lowest risk, slowest results.
- Power washer: Fastest for embedded dirt and gray fiber removal. Keep pressure low and the wand moving, or you will gouge soft wood and drive water into the grain.
- Chemical cleaner: Necessary for mildew removal, heavy staining, and stripping old finish. Follow dwell times exactly.
The pressure washer is where most damage happens: a narrow tip held too close etches permanent stripes no stain will hide.
| Method | Best For | Risk Level | Dry Time Before Staining |
|---|---|---|---|
| Hose and brush | Light dirt, intact finish | Low | 24 hours |
| Power washer | Embedded dirt, gray fibers | Medium to high | 48 hours |
| Chemical cleaner | Mildew, old finish, stains | Medium | 48 hours |
Stripping, Sanding, and Surface Preparation
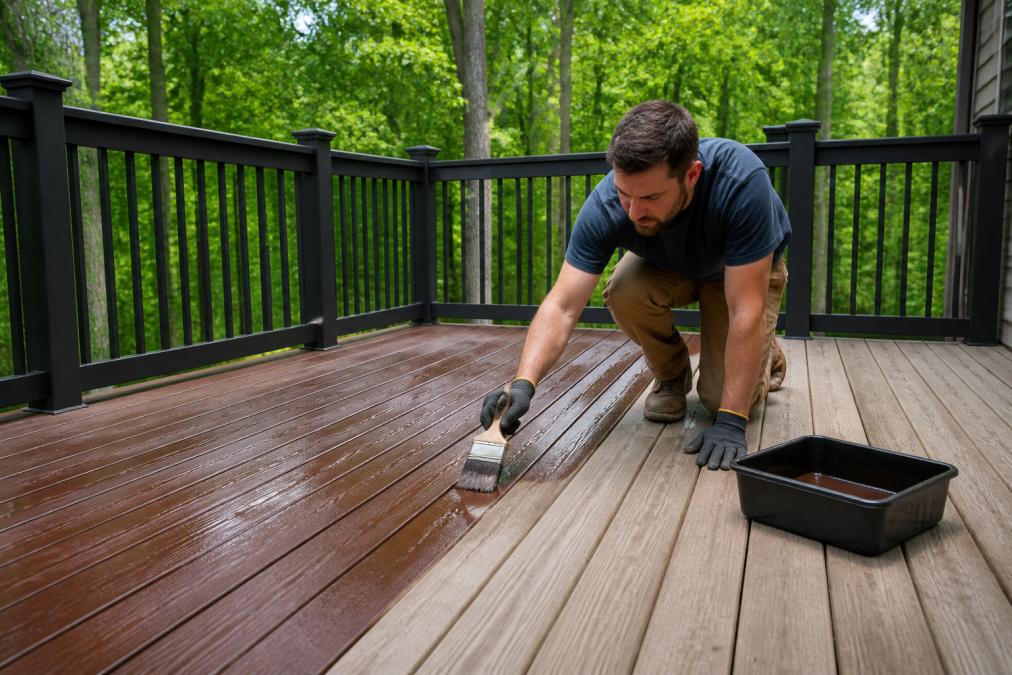
Surface preparation is where the work to refresh decks succeeds or fails, and it is the part most homeowners underestimate. If the water drop test showed beading, that coating has to come off before anything new goes on.
A chemical stripping agent softens old stain or paint so you can lift it with a scraper and stiff brush. Work in sections, keep the surface wet with stripper, and neutralize afterward with a wood brightener to restore an even tone.
Sanding comes next. An orbital sander with 80-grit paper removes raised grain and leftover finish; follow with 120-grit for a surface that accepts stain evenly. Always sand with the grain, and never skip the edges and railings, where uneven color shows most.
U.S. Environmental Protection Agency guidance on safe use of exterior coatings and strippers
Best Deck Stain for Old Wood (and Paint vs. Stain)
Most guides treat "old wood" as one material. It isn't. Pressure-treated pine, cedar, and composite each fail differently, absorb finish differently, and need a different product. Picking the wrong one is the most common reason a refresh looks good in June and bad by October.
Match the Finish to the Material
Pressure-treated pine (PT). The most common deck material in the U.S. New PT lumber is mill-glazed and water-repellent, so it rejects stain for the first several months. Wait until the water drop test shows absorption, often 3 to 12 months after installation, before staining. Once weathered, PT takes a penetrating oil or oil-modified stain well. Avoid film-forming solid stains on PT with high moisture; the coating traps water and peels in sheets.
Cedar and redwood. These species are naturally rot- and insect-resistant thanks to heartwood extractives, but those same extractives make them blotch-prone. A wood conditioner is not optional, it is the difference between an even tone and a tiger-striped deck. Use a penetrating stain, not paint. They also weather to silver-gray faster than PT, so a semi-transparent stain with UV blockers preserves natural color longer than a clear sealer.
Composite (capped polymer, like Trex or TimberTech). Composite is not wood and should never be stained or painted, it does not absorb finish, and any coating will peel. Refresh it by cleaning with a composite-specific cleaner or diluted oxygen bleach and a soft-bristle brush, and by replacing damaged boards. If it is faded, that is a manufacturing issue, not a refinishing one; check the warranty before replacing the whole surface.
Hardwoods (ipe, mahogany, cumaru). These dense species need a penetrating oil designed for tropical hardwoods. Standard deck stains sit on the surface and wear off in traffic lanes within a season. Expect annual re-oiling.
Paint vs. Stain: The Decision Rule
Stain is the right call when boards are structurally sound and you want to see grain. Paint hides more, but it traps moisture if the wood is not perfectly dry and peels in sheets once it fails, meaning a full strip before the next refresh.
- Transparent and semi-transparent stains: Show grain, best for healthy wood, need reapplication more often.
- Semi-solid stains: Some grain show-through, longer service life, good middle ground for weathered but sound boards.
- Solid stains: Hide grain and minor imperfections, longest service life of any stain, look closer to paint.
- Paint: Maximum hiding power, highest risk on a deck that sees foot traffic and moisture. Reserve it for covered porches or decks with a roof.
A wood conditioner applied before staining helps old, porous boards absorb finish evenly and prevents the blotchy look that plagues softwoods. On cedar, redwood, and any deck sanded back to bare wood, it is the highest-return step in the project.
U.S. Environmental Protection Agency guidance on safe use of exterior coatings and strippers
When to Replace Deck Boards Instead of Refinishing
Replace boards when the damage is structural, refinish when it is only cosmetic. That is the line, and it is usually obvious on close inspection.
Signs it is time to replace rather than refinish:
- Boards that crumble or splinter when you press a screwdriver into them
- Soft, spongy spots underfoot
- Joists or framing that show rot at attachment points
- Repeated board replacement in the same area, which signals a moisture problem underneath
When to replace deck boards is a judgment call, but the rule of thumb is simple: if more than a handful of boards are compromised, or the damage reaches the framing, a spot repair will not hold. Refinishing over hidden rot just hides the problem for one more season.
Resurfacing Options: Coatings, Composite, and Stone Decking
Resurfacing is the middle path between a refinish and a full rebuild. It makes sense when the frame, joists, and ledger are sound but the board surface is beyond sanding, cupped, splintered, checked, or refinished one too many times. Before pricing any option, confirm the frame: if the joists are soft or the ledger is pulling away from the house, resurfacing just buries a structural problem.
The Three Resurfacing Paths
Thick restorative coatings. Products in this category, Rust-Oleum Restore is the best-known, are elastomeric, textured coatings applied at roughly 3x the thickness of paint. They fill small cracks and bridge minor imperfections, run around $40 per gallon, and a typical 300-square-foot deck takes 4 to 6 gallons across two coats. The tradeoff: they are difficult to remove later, once cured, the only practical way to change the finish is to replace the boards. They also require a completely dry, sound substrate; trapped moisture causes blistering within a season.
Capped composite board replacement. Swapping wood boards for capped polymer decking (Trex, TimberTech, and similar) is a full board replacement, not a coating. It resists moisture, mold, and mildew and never needs annual staining. Upfront cost is the highest of the three paths, but the 25-to-30-year warranty lifespan changes the math over a decade. The catch: composite sometimes requires different joist spacing, and the existing frame must be inspected and often reinforced before installation.
Stone-based overlay systems. Systems like Tanzite install a stone-look surface over an existing frame. They deliver low maintenance and a premium look, but add significant dead load, far more than wood or composite, so the frame must be engineered to carry it. This is not a DIY product; it is best handled by a professional who can verify structural capacity first.
Choosing Between a Quick Fix and a Structural Restoration
The right path depends on what you are trying to solve.
- Quick aesthetic fix: Clean, brighten, and re-stain a sound wood deck. Or, on composite, deep-clean and replace individual damaged boards. This is the right call when the surface is sound and you just want it to look better.
- Mid-tier refresh: Strip, sand, and refinish a wood deck that has failed finish or heavy graying, plus replace any compromised boards. This buys 3 to 5 years before the next cycle.
- Premium restoration: Full board replacement with capped composite or a stone overlay, assuming the frame passes inspection. This is the path when the wood surface is past saving but the structure is not.
Common Resurfacing Failures to Avoid
- Coating over damp wood: The single most common failure. A thick coating traps moisture and blisters or peels within one season. Always confirm with a moisture meter before applying.
- Coating over a previously sealed deck: Restorative coatings need bare, absorbent wood. If the deck has been stained with a penetrating oil, the coating may not adhere. Test a small area first.
- Skipping the frame inspection: Resurfacing a deck with soft joists or a failing ledger just delays the inevitable and adds cost when the real repair is finally done.
- Choosing composite without checking joist spacing: Some composite products require 12-inch on-center joist spacing; older wood decks are often 16 inches. The frame may need to be rebuilt before boards go down.
| Option | Best For | Maintenance | Upfront Cost | Lifespan |
|---|---|---|---|---|
| Restorative coating | DIY patching, minor surface damage | Moderate (recoat every 3-5 yrs) | Low | 5-10 yrs |
| Capped composite | Long-term board replacement | Minimal (clean only) | High | 25-30 yrs |
| Stone overlay | Stone-look resurfacing | Low | High | 20+ yrs |
For homeowners who want the work done right the first time, Superior Painting and Remodeling LLC handles pressure washing, surface preparation, staining, and structural deck repairs as one project, with a free assessment before any work begins.
Troubleshooting Common Deck Refresh Failures
Most deck refresh failures trace back to moisture, preparation, or timing, not the product. Knowing the usual culprits saves you a second round of work.
- Peeling within a season: Almost always finish applied over a sealed or damp surface. Strip, dry, and retest.
- Blotchy, uneven color: Porous wood absorbed stain unevenly. A wood conditioner and consistent wet-edge technique fix it.
- Finish that never dries: Applied too thick, in direct sun, or in high humidity. Thin coats cure better.
- Gray returns in months: The stain was too transparent for the sun exposure. Step up to a semi-solid or solid formula.
- Mildew keeps coming back: Poor drainage or shaded boards that stay damp. Clean with a mildew remover and improve airflow.
Timing matters as much as technique: wood needs consistent temperatures and low humidity to cure, and staining in direct afternoon sun makes the finish skin over before it penetrates.
American Wood Protection Association standards for exterior wood treatment and preservation
A deck refresh is one of the highest-return exterior projects a homeowner can take on, but the difference between a finish that lasts three seasons and one that lasts ten comes down to diagnosis, preparation, and knowing when a board has to go. If the inspection turns up rot, failing framing, or a surface that has been refinished one too many times, the smart move is a professional assessment before you spend money on products that won't hold.
Superior Painting and Remodeling LLC brings licensed, BBB-accredited craftsmanship to every deck project, from pressure washing and staining to structural board replacement and full resurfacing. Our free project assessments give you an honest read on what your deck actually needs, with pressure-free guidance and reliable completion from start to finish. Call for your estimate and get a deck that holds up season after season.
Frequently Asked Questions
How can I refresh an old deck to make it look new again?
Start by inspecting for rot and testing moisture with the water drop test. Clean the surface with a deck cleaning solution or power washer, strip any failing finish, and sand bare spots. Apply a wood brightener if the boards look gray, let them dry, then seal with a quality deck stain or wood sealer. If boards are soft or splintering, replace them first. A professional assessment helps you decide between refinishing and resurfacing.
Should I sand or power wash my deck before refinishing?
Both have a place. A power washer removes dirt, mildew, and loose finish quickly, but too much pressure etches wood fibers and raises grain. Sanding smooths raised grain and scuffs the surface so stain penetrates evenly. For most old decks, power wash first at low pressure, let boards dry, then sand problem areas with an orbital sander and a sanding block for edges. Surface preparation is what makes any exterior finish last.
What is the best deck stain for old wood?
For old, weathered wood, a penetrating semi-transparent stain outperforms solid films because it soaks into wood fibers instead of sitting on top. It hides less but resists peeling. If boards are deeply checked, a deck resurfacer like Rust-Oleum Restore fills small cracks. Always apply a wood conditioner or brightener first so stain penetration is even. Test a small area before committing to a full coat.
How do I know if my deck needs to be replaced or just restored?
Check deck boards and deck joists for soft spots, splintering, and wood rot with a screwdriver. If damage is limited to a few boards, replace those and refinish the rest. If joists or the ledger board are compromised, or if more than a third of the surface is failing, full replacement with composite like TimberTech or a stone-based system like Tanzite may cost less over time. A contractor can confirm structural safety before you invest in a finish.