 how-to
Protecting Your Home During Interior Painting
Table of Contents
- Clear the Room and Plan Your Work Zones
- Protect Floors and Furniture the Right Way
- Best Drop Cloths for Interior Painting
- How to Protect Baseboards When Painting Walls
- Cover Fixtures, Outlets, and Smart Home Devices
- Ventilation Tips for Interior Painting
- Safety Precautions for Children and Pets
- Post-Painting Cleanup and Surface Care
- Frequently Asked Questions
Last Updated: September 3, 2026
Clear the Room and Plan Your Work Zones
Protecting your home during interior painting starts before the first brush touches the wall. The most effective approach is to identify what stays and what goes, then create distinct work zones that contain dust, fumes, and accidental spills. This guide walks through the specific steps that prevent damage, minimize cleanup, and keep your household running smoothly while painters work.
Begin by removing everything movable from the room. Small items like lamps, picture frames, and decorative objects should be relocated to another area entirely, not just pushed to the center of the room. Larger furniture pieces that can't be moved should be grouped together and covered. The goal is to create open floor space where drop cloths can lay flat without wrinkles or gaps.
Next, establish a clear entry and exit point for workers. This single pathway reduces the risk of paint accidentally spreading to unintended areas. Tape off access routes with painter's tape if needed, and place a boot scraper or absorbent mat at the entrance. Keeping a damp cloth station just inside the work zone so painters can wipe hands and tools before leaving can be a good practice.
Seal doorways to adjacent rooms using plastic sheeting and painter's tape. Even with proper ventilation, some dust and VOCs will migrate. A sealed doorway creates a barrier that keeps the work zone contained. Leave the plastic in place until final cleanup is complete.
Protect Floors and Furniture the Right Way
Floor protection is non-negotiable. Hardwood, tile, laminate, and carpet all require different approaches, but the principle is the same: create a barrier between the surface and paint, dust, and moisture.
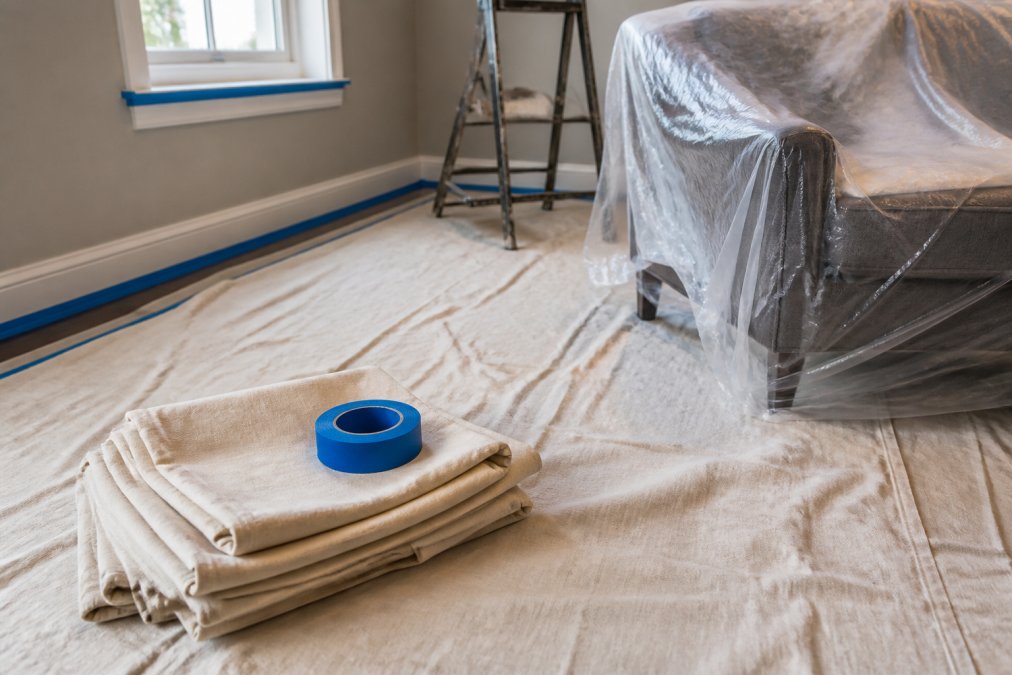
For hardwood floors, start with a quality drop cloth. Canvas drop cloths are superior to plastic for this purpose because they absorb spills rather than allowing paint to pool and spread. Plastic sheeting underneath the canvas prevents moisture from seeping into the wood. Secure all edges with painter's tape to prevent tripping hazards and to stop paint from creeping underneath.
Carpet requires extra care. Use a combination of plastic sheeting and canvas drop cloths. The plastic goes down first to block moisture, then the canvas on top for absorbency and safety. Painters should avoid walking on the canvas repeatedly in the same spot, as this can compress fibers and create permanent marks.
For tile and laminate, plastic sheeting alone is sufficient, but securing it properly is essential. Unsealed edges allow spills to seep underneath. Use painter's tape along all perimeters and create overlapping seams so liquid cannot find a path to the floor surface.
Furniture left in the room should be covered with plastic sheeting or drop cloths. Heavy furniture can be wrapped with plastic and secured with tape. Lighter pieces benefit from being pushed to the room's center and covered as a group. Ensure all coverings are secure and won't shift during the painting process.
Best Drop Cloths for Interior Painting
The choice between canvas and plastic drop cloths determines how effectively you protect your home during interior painting. Canvas drop cloths are absorbent, reusable, and create a stable surface that won't shift underfoot. They cost more initially but last for years and are worth the investment for serious protection. Plastic sheeting is affordable and disposable, but it's slippery and allows paint to pool and spread rather than absorb.
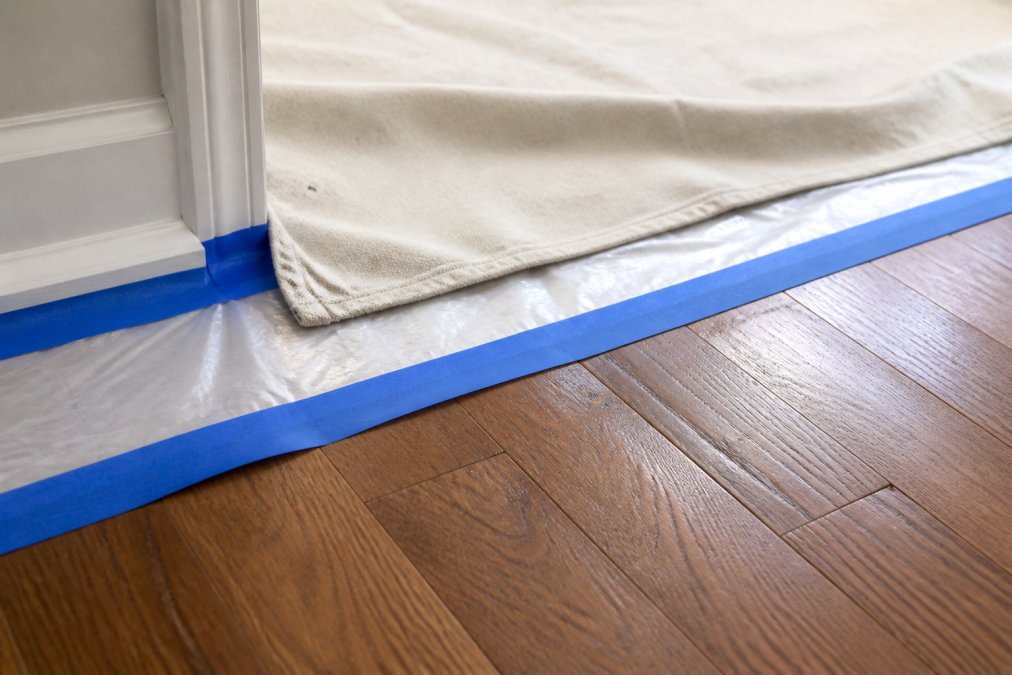
For most interior painting projects, a hybrid approach works best. Lay plastic sheeting first to block moisture and spills from reaching the floor. Overlay canvas drop cloths on top for traction and absorbency. This combination prevents paint from spreading while protecting against water damage.
Canvas drop cloths come in various weights. Lighter canvas (around 6 ounces) is suitable for basic protection but wears quickly. Medium-weight canvas (9-12 ounces) is standard for most projects and balances durability with cost. Heavy-weight canvas (13+ ounces) is best for high-traffic areas and frequent reuse.
When laying drop cloths, overlap seams by at least 6 inches and secure all edges with painter's tape. Wrinkles and gaps are where accidents happen. Smooth the cloth flat before taping, and check periodically throughout the project to ensure the cloth hasn't shifted.
Plastic sheeting comes in various thicknesses, measured in mils. Standard 0.5-mil plastic is adequate for most interior work. Thicker plastic (1-2 mil) resists punctures better but is harder to work with and more expensive. Always use the heaviest plastic you can manage without creating safety hazards.
How to Protect Baseboards When Painting Walls
Baseboards are the most commonly damaged element during interior painting because they're easy to brush against and hard to mask perfectly. The best strategy combines careful taping with physical barriers.
Start by cleaning baseboards with a damp cloth to remove dust and debris. Paint adheres poorly to dirty surfaces, and any particles trapped under tape will create gaps. Allow them to dry completely before applying painter's tape.
Apply painter's tape along the top edge of the baseboards, creating a seal that prevents paint from seeping underneath. Use quality painter's tape, cheap tape allows paint bleed-through. Press the tape firmly along its entire length, paying special attention to corners where the baseboard meets the wall.
For added protection, place a plastic guard or cardboard shield along the baseboard. Some painters use a thin plastic edge guard that snaps onto the tape. Others place a piece of cardboard or thin plywood against the baseboard to catch drips. These physical barriers catch paint before it reaches the wood.
When painting, maintain a steady hand and keep the brush slightly away from the baseboard. A small gap between the brush and the tape is safer than pressing the brush directly against the tape line. Paint tends to wick along the bristles and can seep under tape if the brush is forced against it.
After painting, remove the tape while the paint is still slightly tacky, not fully dry and not wet. This prevents the paint from peeling away with the tape. Pull the tape at a 45-degree angle, slowly and steadily.
Cover Fixtures, Outlets, and Smart Home Devices
Light fixtures, ceiling fans, outlet covers, and switch plates must be either removed or covered. Removing them is usually faster than masking, but if removal isn't practical, careful covering works.
For removable fixtures like outlet covers and switch plates, turn off power at the breaker, remove the cover, and store it safely out of the work zone. This takes minutes and eliminates the risk of paint damage. Label the breaker switch so power remains off during painting.
Ceiling fans and light fixtures should be turned off and covered with plastic bags secured with tape. Leave them in place if removal requires special tools or knowledge. Ensure the plastic covering doesn't restrict airflow to the fixture, as this can cause heat buildup.
Smart home devices like thermostats, smart speakers, and motion sensors are particularly vulnerable. Paint fumes can damage electronics, and direct paint contact is obviously problematic. Cover these devices with plastic bags or boxes. For devices mounted on walls, a simple plastic bag secured with painter's tape provides adequate protection.
Recessed lighting and vents need special attention. Tape plastic over recessed lights to prevent paint overspray and dust accumulation. Vents should be covered with plastic sheeting taped securely around the perimeter to prevent air circulation from carrying paint particles into the ventilation system.
After painting is complete, leave covers in place until paint has fully cured. This prevents dust from settling on wet paint and gives the paint surface time to harden before any covers are removed.
Ventilation Tips for Interior Painting
Proper ventilation protects both your home's air quality and the paint's curing process. Paint releases VOCs (volatile organic compounds) that can cause headaches, respiratory irritation, and other health effects if not properly managed (the EPA).
Open windows on opposite sides of the room to create cross-ventilation. This allows fresh air to flow through while pushing paint fumes out. If the room has only one window, open it fully and use a fan to direct air outward. Position the fan in the window facing outward, not inward, pulling fumes out rather than pushing them deeper into the home.
For rooms without windows, portable air purifiers with activated carbon filters help reduce VOC concentration. These are not a substitute for ventilation but a supplement. Continue running the purifier for several hours after painting is complete.
Keep doors to other rooms closed and sealed with plastic sheeting. This prevents paint fumes from migrating throughout your home. However, ensure the work zone itself has adequate fresh air exchange, a sealed room with no ventilation traps fumes at dangerous concentrations.
Paint curing time varies by product, but most interior paints continue releasing VOCs for days after application. Keep windows open and ventilation running for at least 24-48 hours after the final coat. Some low-VOC paints cure faster, but don't assume paint is safe to be around just because it feels dry to the touch.
If anyone in your household has respiratory sensitivity, asthma, or chemical sensitivities, consider using a respirator during painting and for several hours afterward. A simple dust mask won't filter VOCs, a proper respirator with organic vapor cartridges is necessary (the CDC).
Safety Precautions for Children and Pets
Protecting your home during interior painting includes protecting the people and animals living there. Paint fumes and equipment pose specific hazards that require advance planning.
Arrange for children to stay elsewhere during painting and for at least 24 hours afterward. If this isn't possible, confine them to a sealed room far from the work zone with windows open to the outside. Keep the door closed and sealed with plastic to minimize fume exposure. Provide toys, activities, and supervision to prevent them from entering the work area out of curiosity.
Pets are equally vulnerable to paint fumes and should be relocated if possible. If pets must stay home, confine them to a room far from the work zone with windows open and doors sealed. Ensure they have access to fresh water and normal activities. Some pets become anxious when confined, so comfort measures may be necessary.
Paint equipment itself poses hazards. Brushes, rollers, paint trays, and ladders create tripping hazards and can cause injuries. Establish a clear rule that children and pets stay out of the work zone entirely. Use baby gates or temporary barriers to prevent accidental access.
Ladder safety is critical. Ensure ladders are placed on level ground and stabilized. Never leave a ladder unattended in an accessible area. After work ends each day, store ladders safely out of reach.
Paint supplies should be stored securely. Cans should be kept closed and stored in a cool, well-ventilated area. Keep paint out of reach of children and pets. Some paints contain toxic compounds that are dangerous if ingested.
Watch for signs of paint exposure: headaches, dizziness, nausea, or respiratory irritation. If anyone experiences these symptoms, move them to fresh air immediately and seek medical attention if symptoms persist.
Post-Painting Cleanup and Surface Care
Cleanup begins during painting, not after. Wipe spills immediately with a damp cloth before paint dries. This prevents staining and makes cleanup easier overall.
After the final coat, allow adequate curing time before removing protective coverings. Most interior latex paints are dry to the touch within 2-4 hours but require 24-48 hours for full curing (peer-reviewed research). Oil-based paints cure more slowly, sometimes requiring a week or more. Check the paint manufacturer's specifications for exact timing.
Remove painter's tape while paint is still slightly tacky. If you wait until paint is fully dry, the paint film can peel away with the tape. Pull tape at a 45-degree angle in a slow, steady motion. This technique prevents tearing the tape and damaging the painted surface.
Once tape is removed, carefully fold and remove drop cloths. Dispose of disposable plastic sheeting. Canvas drop cloths should be cleaned and stored for future use. Hose them down or wash them to remove dried paint, then allow them to dry completely before storing.
Baseboards and trim may have paint drips or splatters. Allow paint to dry completely, then use a plastic scraper to carefully remove dried paint. For stubborn spots, a plastic scraper with a small amount of paint thinner works better than aggressive scraping that can damage the wood.
Ventilation should continue for 48 hours after painting is complete. Keep windows open and fans running to allow paint fumes to dissipate. This protects your family's health and allows the paint to cure properly.
Inspect the painted surfaces for missed spots, drips, or uneven coverage. Touch-ups are easiest when done within a few days of the final coat, before the paint fully cures. Small brush-applied touch-ups blend better with fresh paint than with paint that has cured for weeks.
Store leftover paint in a cool, dark place for future touch-ups. Label the can with the room name and paint color for easy identification. Properly sealed paint cans remain usable for years.
Frequently Asked Questions
Q: How long do paint fumes stay in a house after interior painting?
A: Paint fumes typically dissipate within 24-48 hours with proper ventilation, though low-VOC paints may clear faster. Opening windows, using fans, and running HVAC systems accelerates air circulation. Full curing of the paint itself takes 1-2 weeks depending on humidity and temperature, but harmful fumes are largely gone within the first two days. Keep children and pets away during painting and for at least 24 hours after.
Q: What's the best way to cover furniture for protecting home during interior painting?
A: Move furniture to an adjacent room whenever possible. For pieces that must stay, cover them with plastic sheeting or drop cloths secured with painter's tape, avoid using bedsheets, which don't block paint droplets effectively. Leave gaps at the bottom for air circulation to prevent moisture buildup. For valuable or delicate items, store them in a closet or garage during the project.
Q: Can I stay in my house while it's being painted?
A: Yes, you can stay home during interior painting, but plan to spend time in well-ventilated areas away from the work zone. Open windows in rooms being painted and keep doors closed to contain fumes and dust. Many homeowners find it easier to stay elsewhere for the first 24 hours while VOCs clear. If you have respiratory concerns, young children, or pets, consider temporary relocation during active painting.
Q: How do you protect hardwood floors from paint spills during interior painting?
A: Layer canvas drop cloths first for grip and absorbency, then add plastic sheeting on top for spill containment. Secure all edges with painter's tape to prevent trip hazards and paint seepage. For emergency spills, wipe immediately with a damp cloth before paint dries. Never let paint sit on hardwood, quick cleanup prevents staining and adhesive residue that damages finishes.
Protecting your home during interior painting is straightforward when you plan ahead and use the right materials. Superior Painting and Remodeling LLC helps homeowners manage every detail of interior painting projects, from initial protection setup through final cleanup. Our team handles the logistics so you don't have to worry about damage or disruption. Call for your estimate and let us show you how professional planning makes the entire process smoother and safer for your family.
This article was written using GrandRanker